Build a Call-to-Slack Summary Workflow in 5 Minutes
After every sales call, you spend 15 minutes writing notes, updating the CRM, and pinging your team about next steps.
What if it just… happened?
Your call recorder probably has a built-in summarizer—but it’s a black box. You can’t customize the prompts, pick a better model, or do anything with the output. When you build your own, you control exactly what gets extracted, how it’s formatted, and where it goes next.
In this guide, you’ll build a simple workflow that takes a call transcript and posts a summary to Slack. Along the way, you’ll learn the fundamentals—inputs, blocks, dependencies, and outputs—that power every Scout automation. Once you’ve got the basics, you can extend this workflow or build something entirely new.
Create your workflow
- Sign up free or sign in
- Click Studio in the sidebar, then click Workflows
- Click + New to create a new workflow
- Name it “Call Summary Bot” and click Create
You’ll see an empty workflow canvas with a “Set a trigger” button.
Set up the Input
- Click Set a trigger
- Click Input from the list
- In the settings panel on the right, change the ID from
messagetotranscript - Click anywhere on the canvas to close the settings
This creates an input field where you’ll paste your call transcripts.
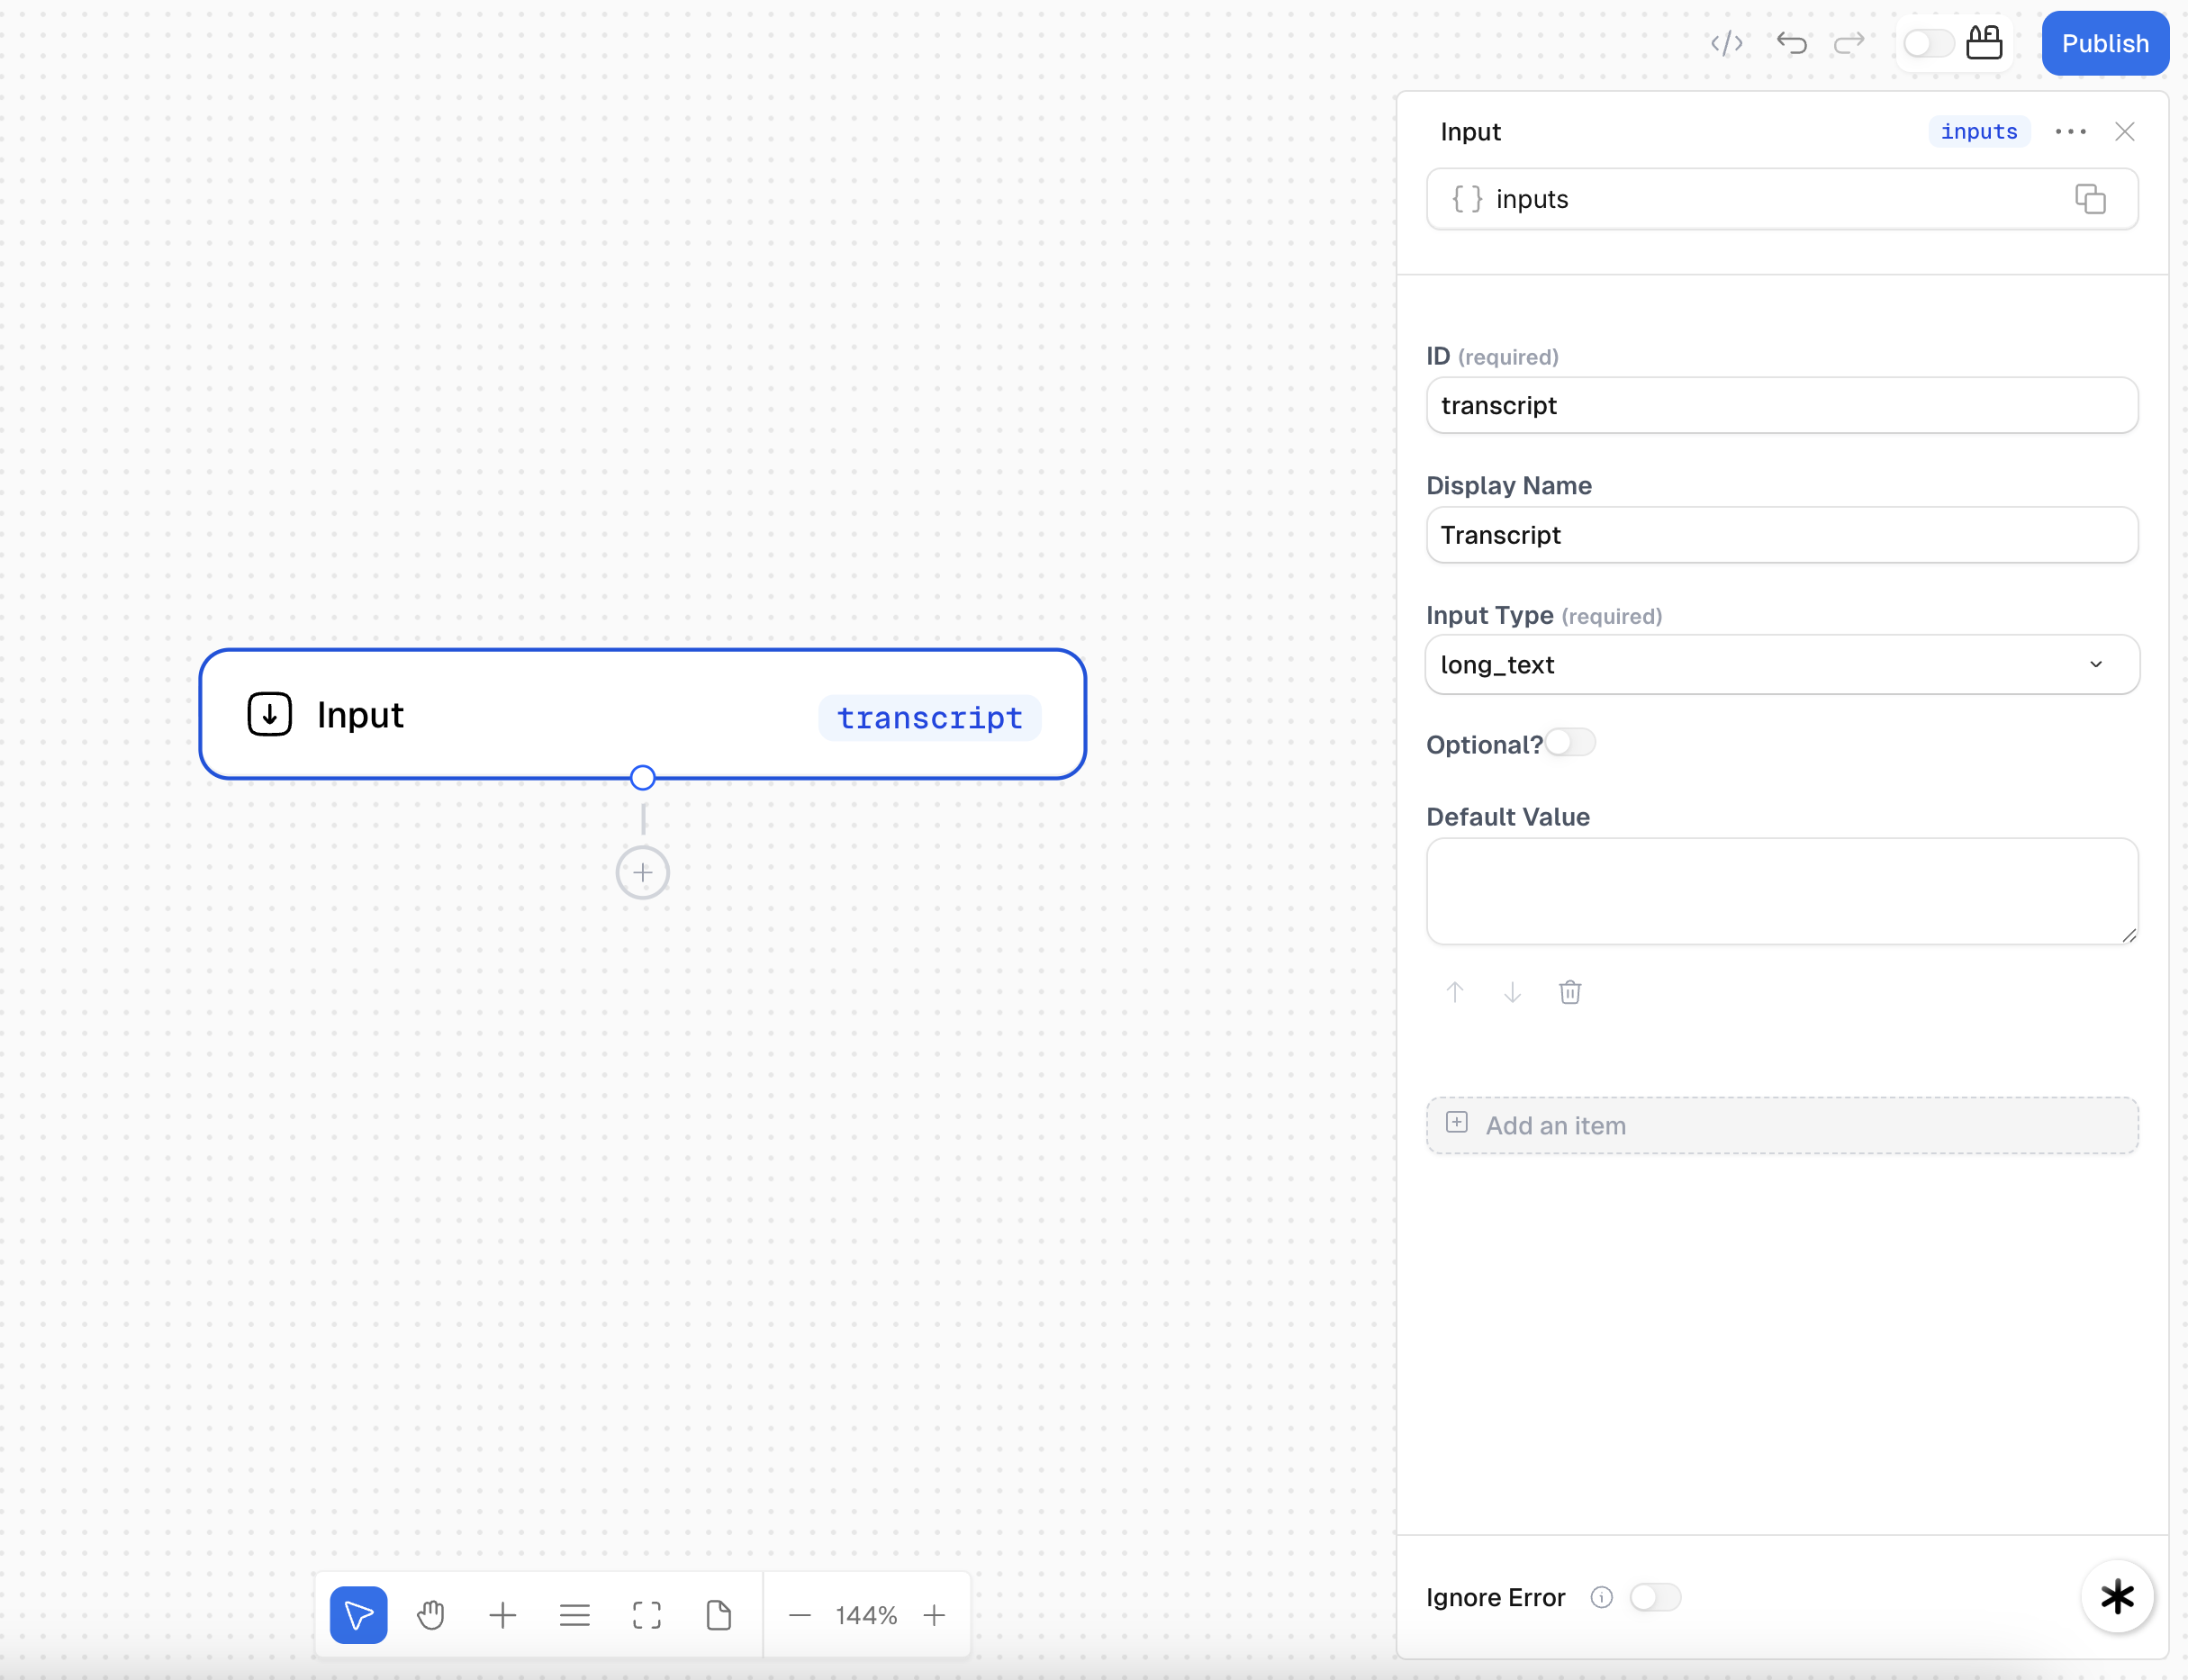
The ID you set here (transcript) is how you’ll reference this input in other blocks: {{ inputs.transcript }}
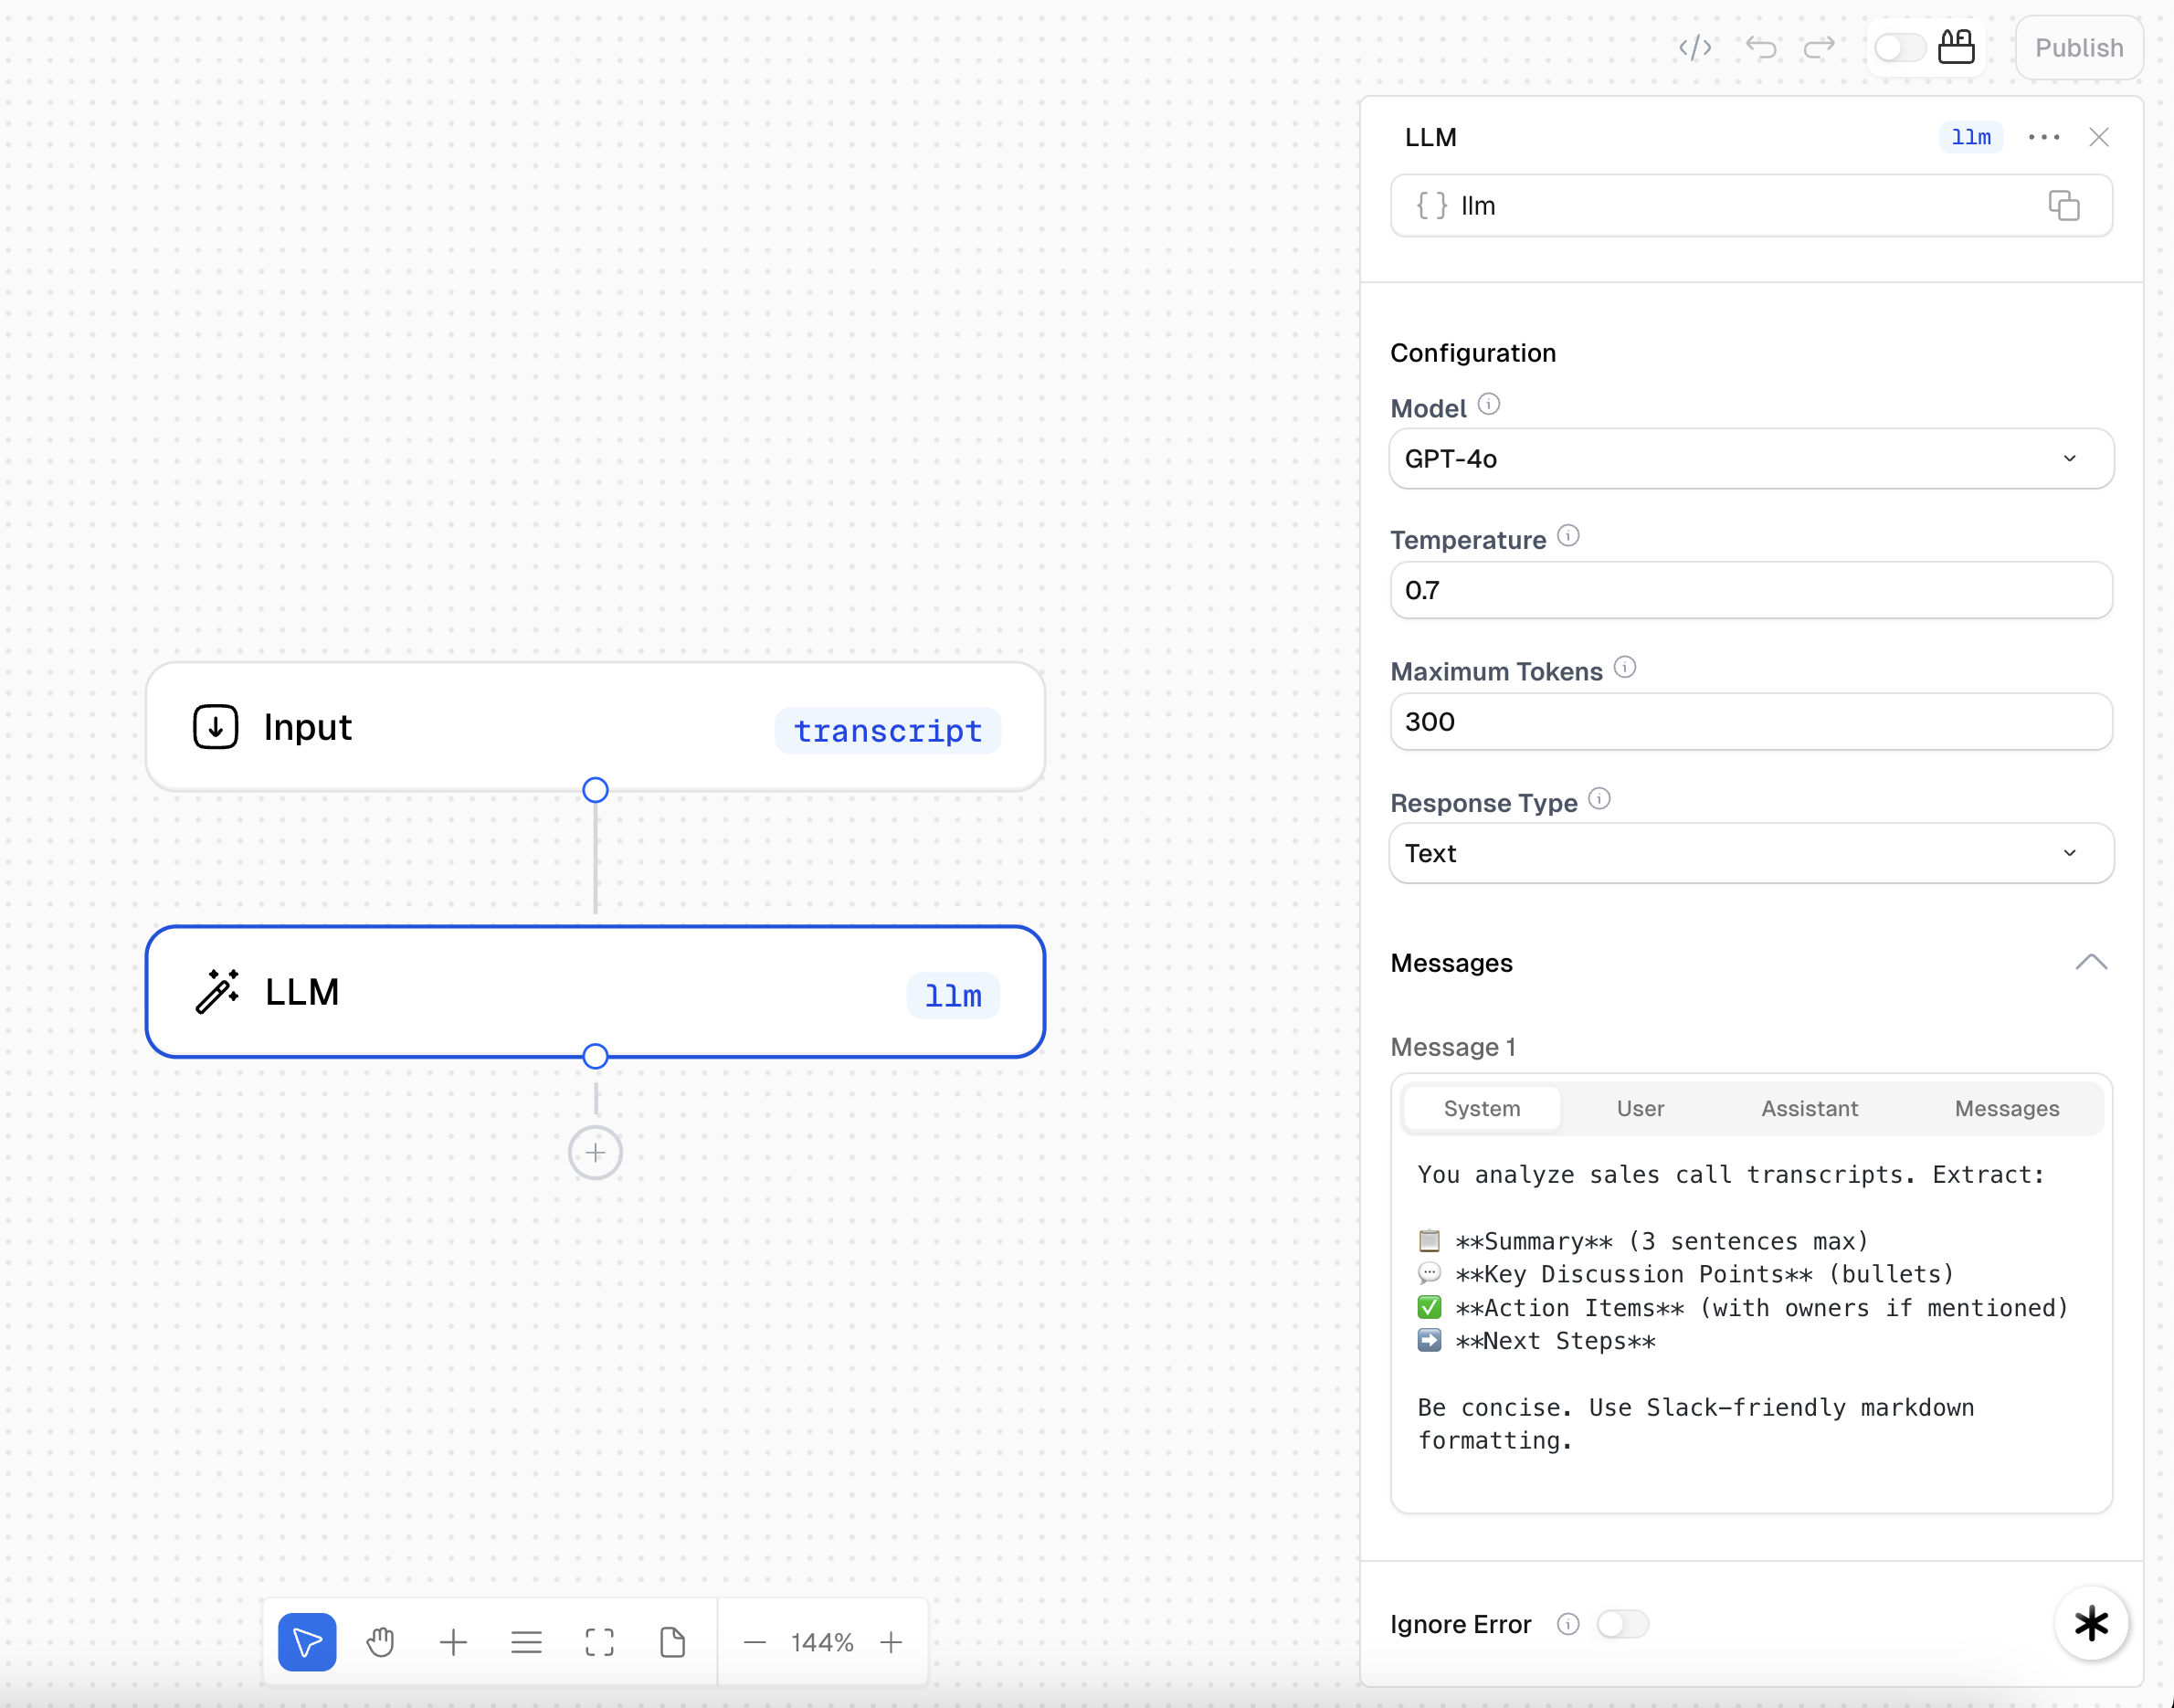
Add the LLM block
This block will analyze the transcript and extract the important stuff.
- Click the + button at the bottom of the canvas
- Search for LLM and drag it onto the canvas
- Connect the blocks: Draw a line from the bottom of the Input block to the top of the LLM block
This line declares a dependency—it tells Scout that the LLM block should run after the Input block, and can access its data. Blocks without connections run in parallel.
- Click the LLM block to open its settings
- Configure it:
- Model:
gpt-4o - System message:
- User message:
- Model:
Test it out
Before adding more blocks, let’s see it work! You can test anytime using the debug console.
-
Click the ▶ Play button in the top left to open the Console
-
Paste this sample transcript:
Sample Transcript -
Click Run
-
Watch the LLM extract a clean summary with action items ✨
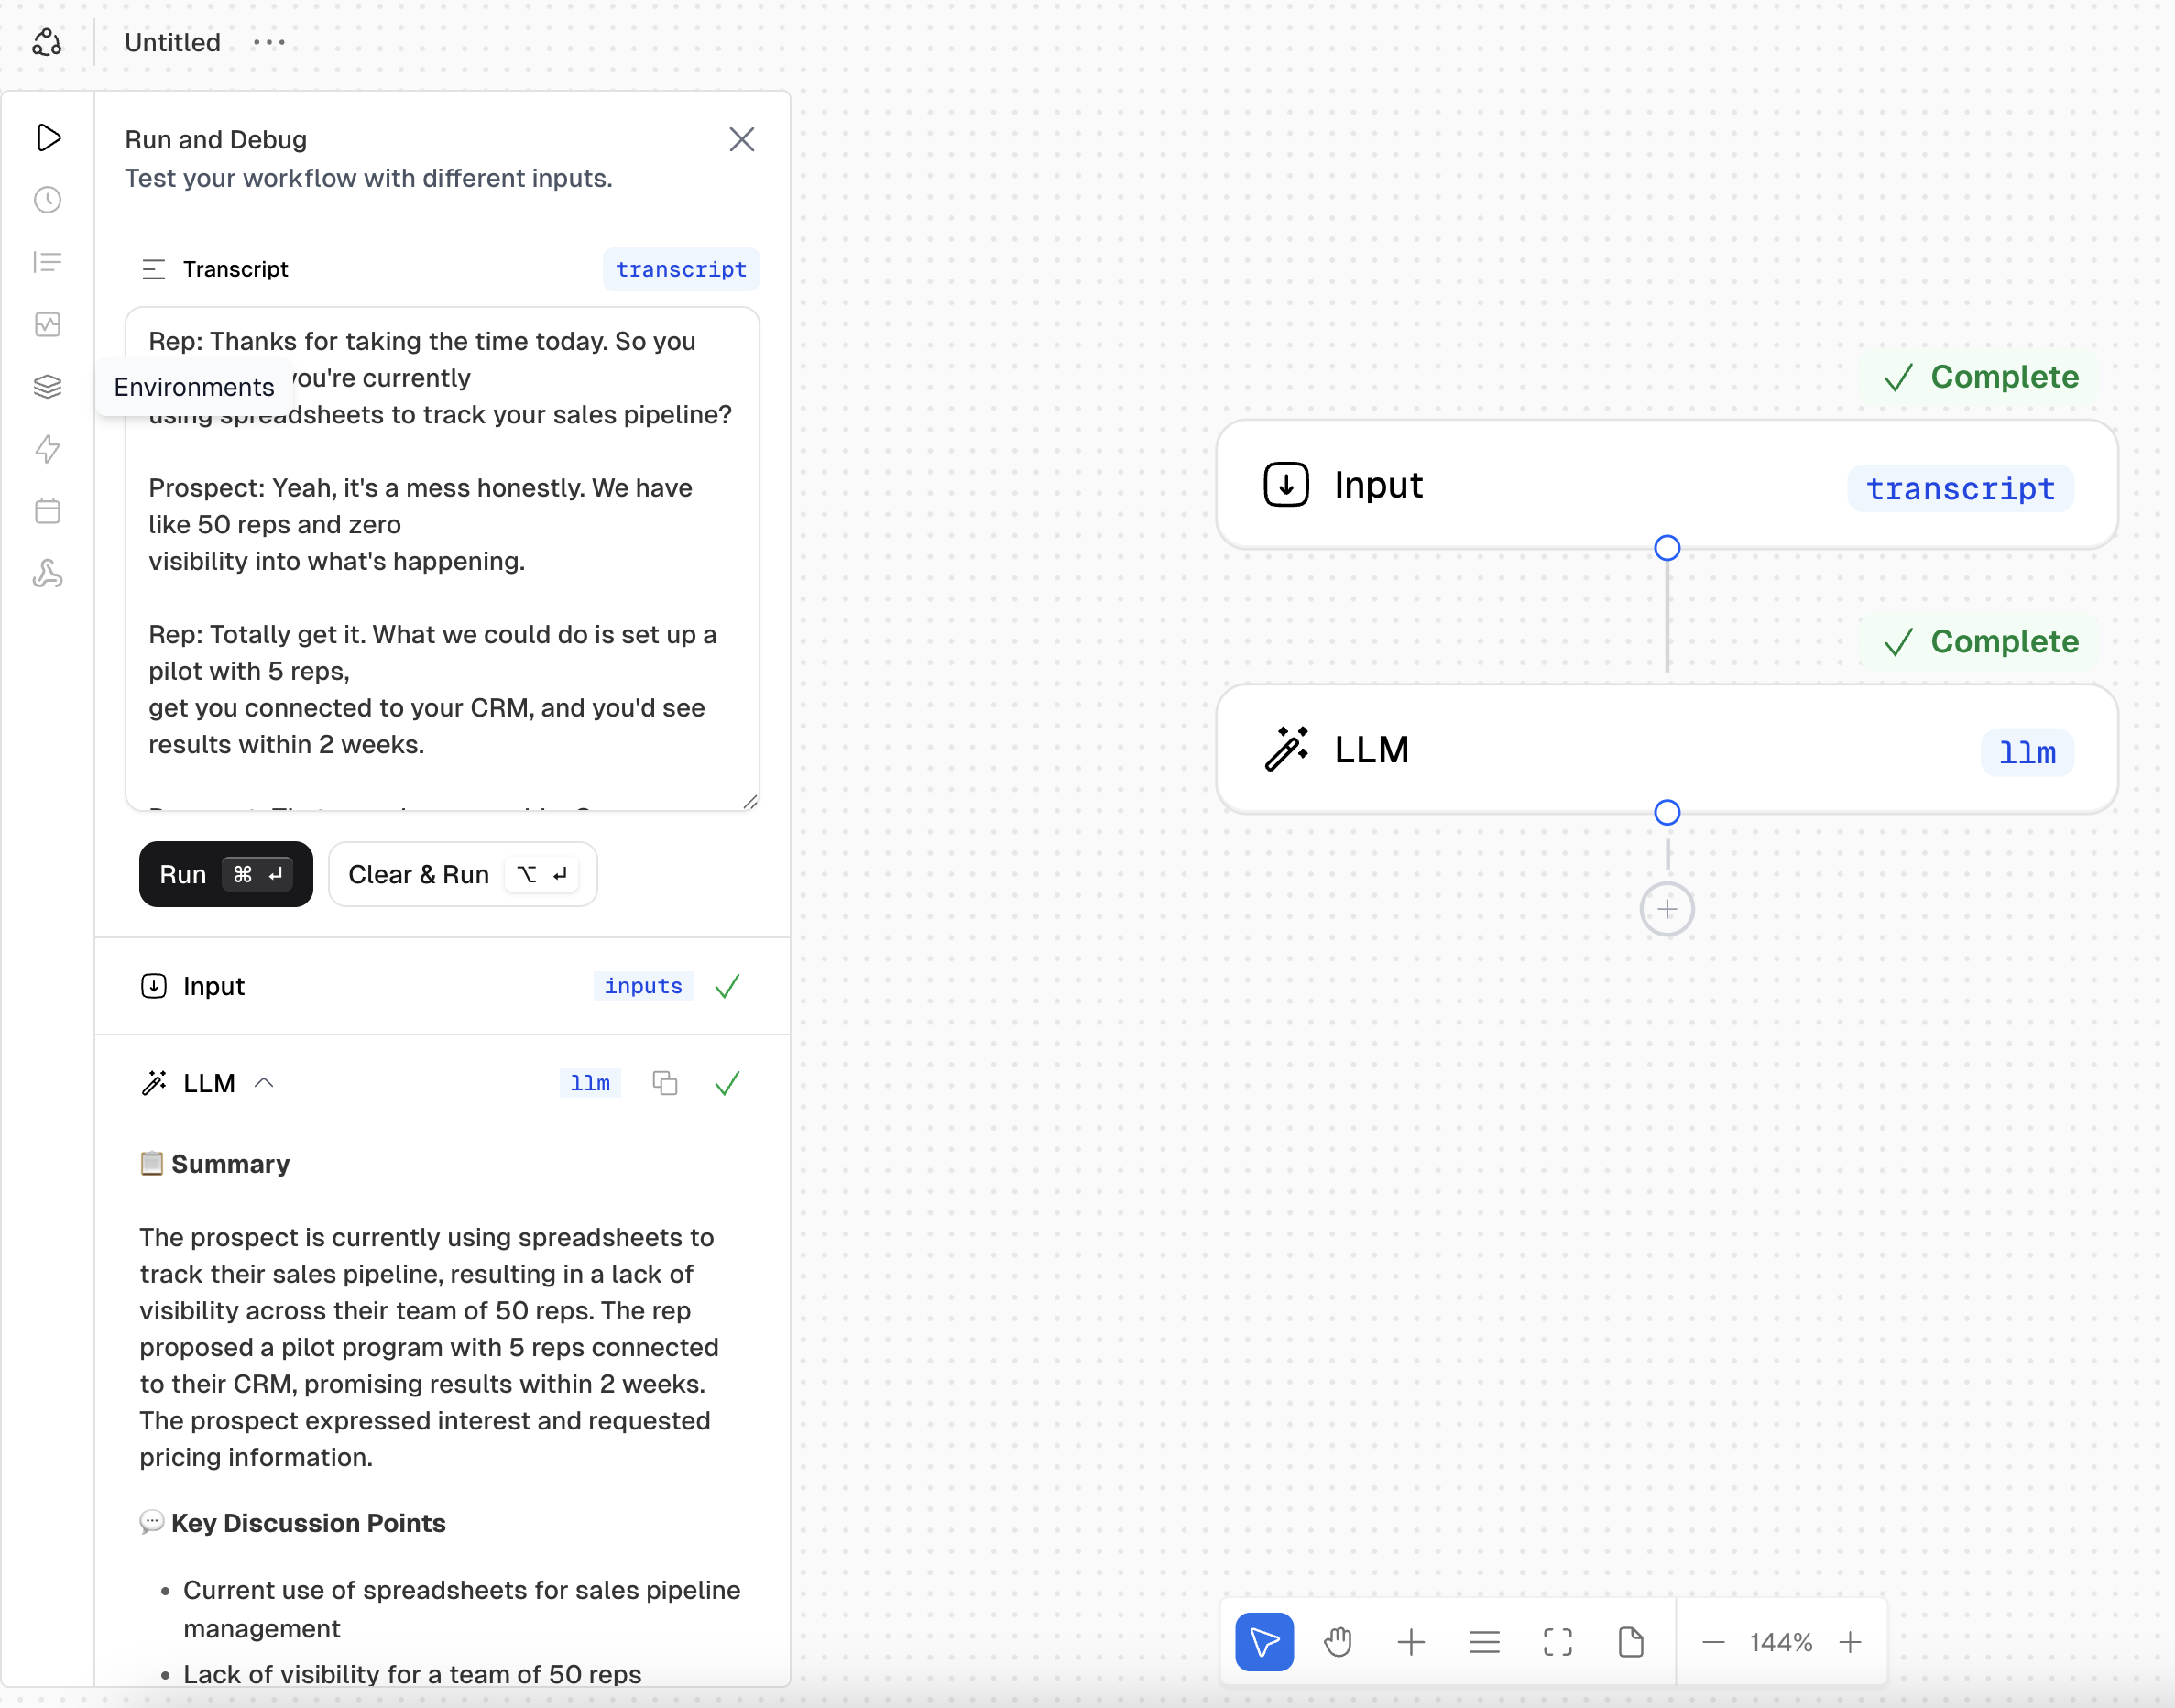
The debug console lets you test your workflow at any point—no need to publish first.
Add the Slack block
Now let’s send that summary to your team automatically.
- Click the + button at the bottom of the canvas
- Search for Post Slack Message and drag it onto the canvas
- Connect the blocks: Draw a line from the bottom of the LLM block to the top of the Slack block
- Click the Slack block to configure it:
-
Slack Workspace: Select your workspace, or click + Add Workspace to connect Slack
-
Channel: Select your channel (e.g.,
#sales-calls) -
Message:
{{ llm.output }}Replace
llmwith your actual block ID—find it by hovering over the LLM block and clicking the copy icon.
-
First time with Slack? After connecting your workspace, add the Scout bot to your channel by typing @Scout and clicking Add to Channel.
What You Just Built
You created a workflow that:
- Takes input → the transcript
- Processes it with AI → LLM extracts summary + action items
- Sends it somewhere useful → Slack channel
This is the core pattern for most Scout automations: Input → Process → Output.
This simple workflow is just the starting point. From here, you can add more blocks, chain multiple AI calls, branch with conditionals, or connect to other services. The same fundamentals you just learned apply to everything you’ll build in Scout.
What’s Next?
You’ve got the basics. Now make it powerful:
Create an AI assistant that can use tools and make decisions
Add deal notes to your CRM automatically
Create an AI that answers questions using your data
See everything you can build with
Want to skip the building? Check out our Workflow Templates to start from pre-built automations.