Build a RAG App
Create a retrieval-augmented generation app with Databases
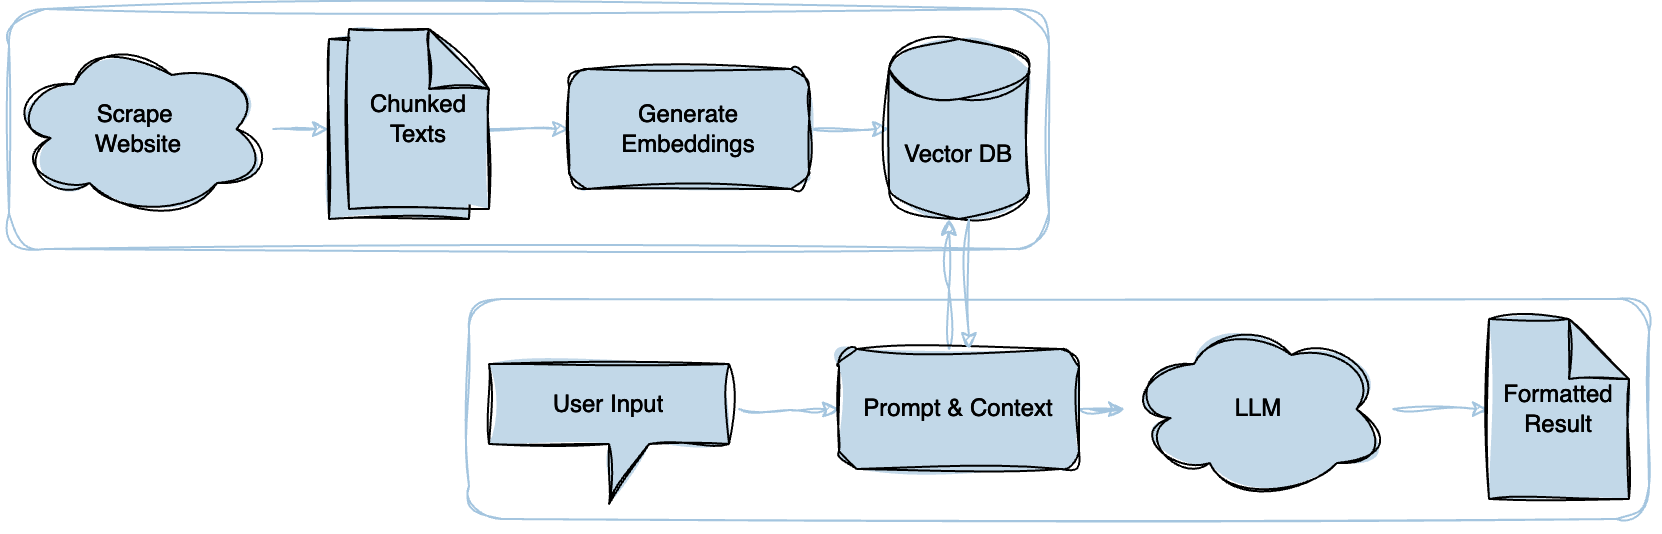
In this tutorial, you’ll build a RAG (Retrieval-Augmented Generation) app that answers questions using your own data. This is a common pattern for building knowledge base assistants, documentation bots, and support agents.
Integrate your data
Scout stores your data in databases, which are groups of documents. Each document can contain metadata and text content. The text content is chunked and used for vector search. The metadata can be used to filter and sort the documents. Scout abstracts all of this complexity and provides a simple process to upload documents as outlined below:
Create a database
- Sign up for free or sign in to Scout
- Once logged in, click “Databases” in the nav
- Click ”+ New”
- Name and create your database
- Once your database is provisioned, click it to open it
Configure the table
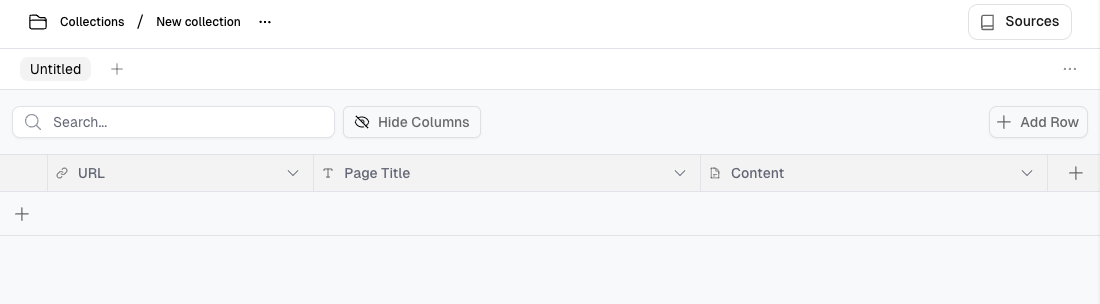
- Once inside the newly created database, you will be in the default
Untitledtable. Click the ”+” button to add columns.

- We’ll add two columns:
- One named
URLwith a column type ofURL - And one named
Page Titlewith a column type ofSingle Line Text
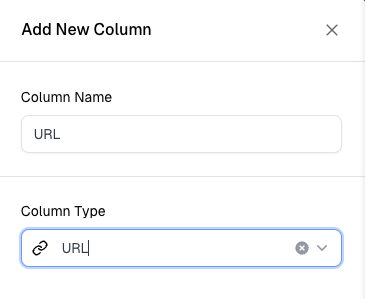
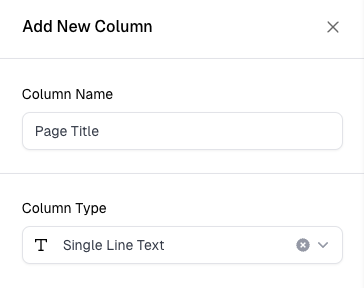
- Once completed, our table should look as follows, with 3 columns:
Upload documents
There are 4 primary ways you can add documents to a database in Scout:
- Give Scout a URL or website to scrape
- Use integration sources
- Create a document directly in Scout
- Use Scout’s API, TypeScript or Python SDKs.
In this guide, we’ll build a database by scraping Scout’s docs (Scoutception?) but feel free to choose your own adventure for this section.
First, in your database, click “Sources” in the nav at the top, then click “Add Source” to start adding documents. Then, select the “Website Crawl” option.

- Settings: Enter
https://scoutos.comas the URL - Mapping: Map the crawl values to the colums we created in our table.
- Frequency: For this example, we can skip the Frequency section. It’s used to schedule crawl refreshes; for example if you want to crawl your docs every week to keep the documents in your table up to date.
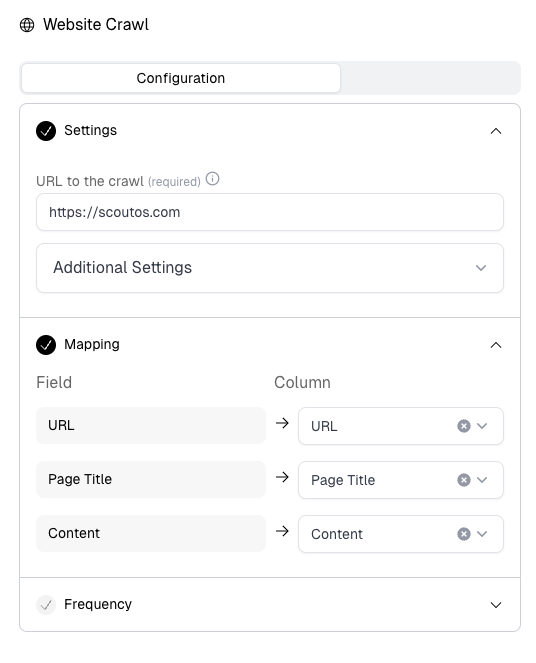
- Click the “Create” button, then the “Run” button to start scraping the Scout website. You’ll see the progress and status of the process. Once it’s complete, move on to the next step to configure your workflow.

Configure your workflow
Workflows consist of inputs, composable blocks which represent different actions, and outputs. They can be created from scratch, cloned from an existing workflow, or started with a template. Each block is designed with its own set of configurations. In this guide, we’ll create a workflow that uses an input, a collection search, an LLM, and then output:
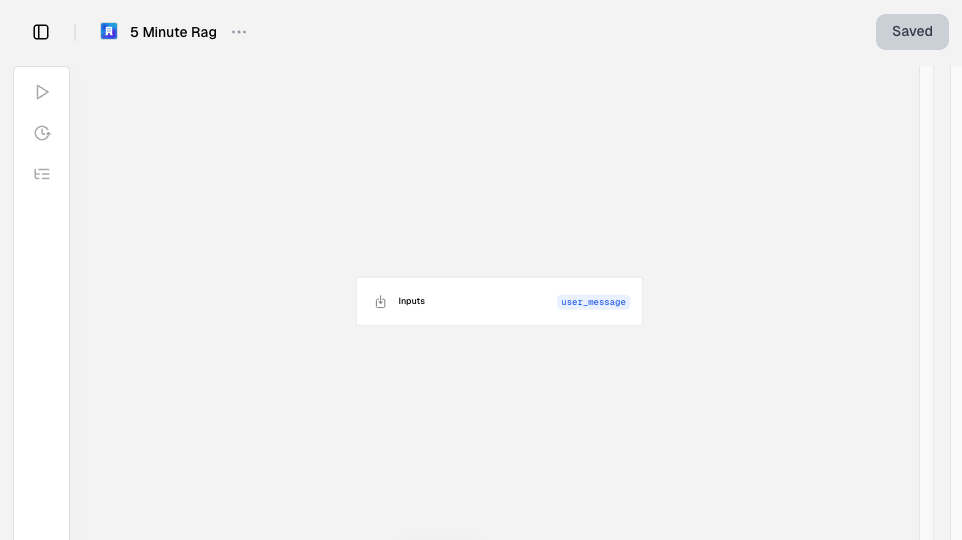
Create a workflow
- Click “Workflows” in the nav
- Click ”+ New” to create a new workflow
- Name your workflow and click the “Create” button. You’ll see your empty workflow canvas:
Add a database query block
- At the bottom of the workflow canvas click the ”+” button and drag a new Scout > Query Collection Table block onto the workflow canvas
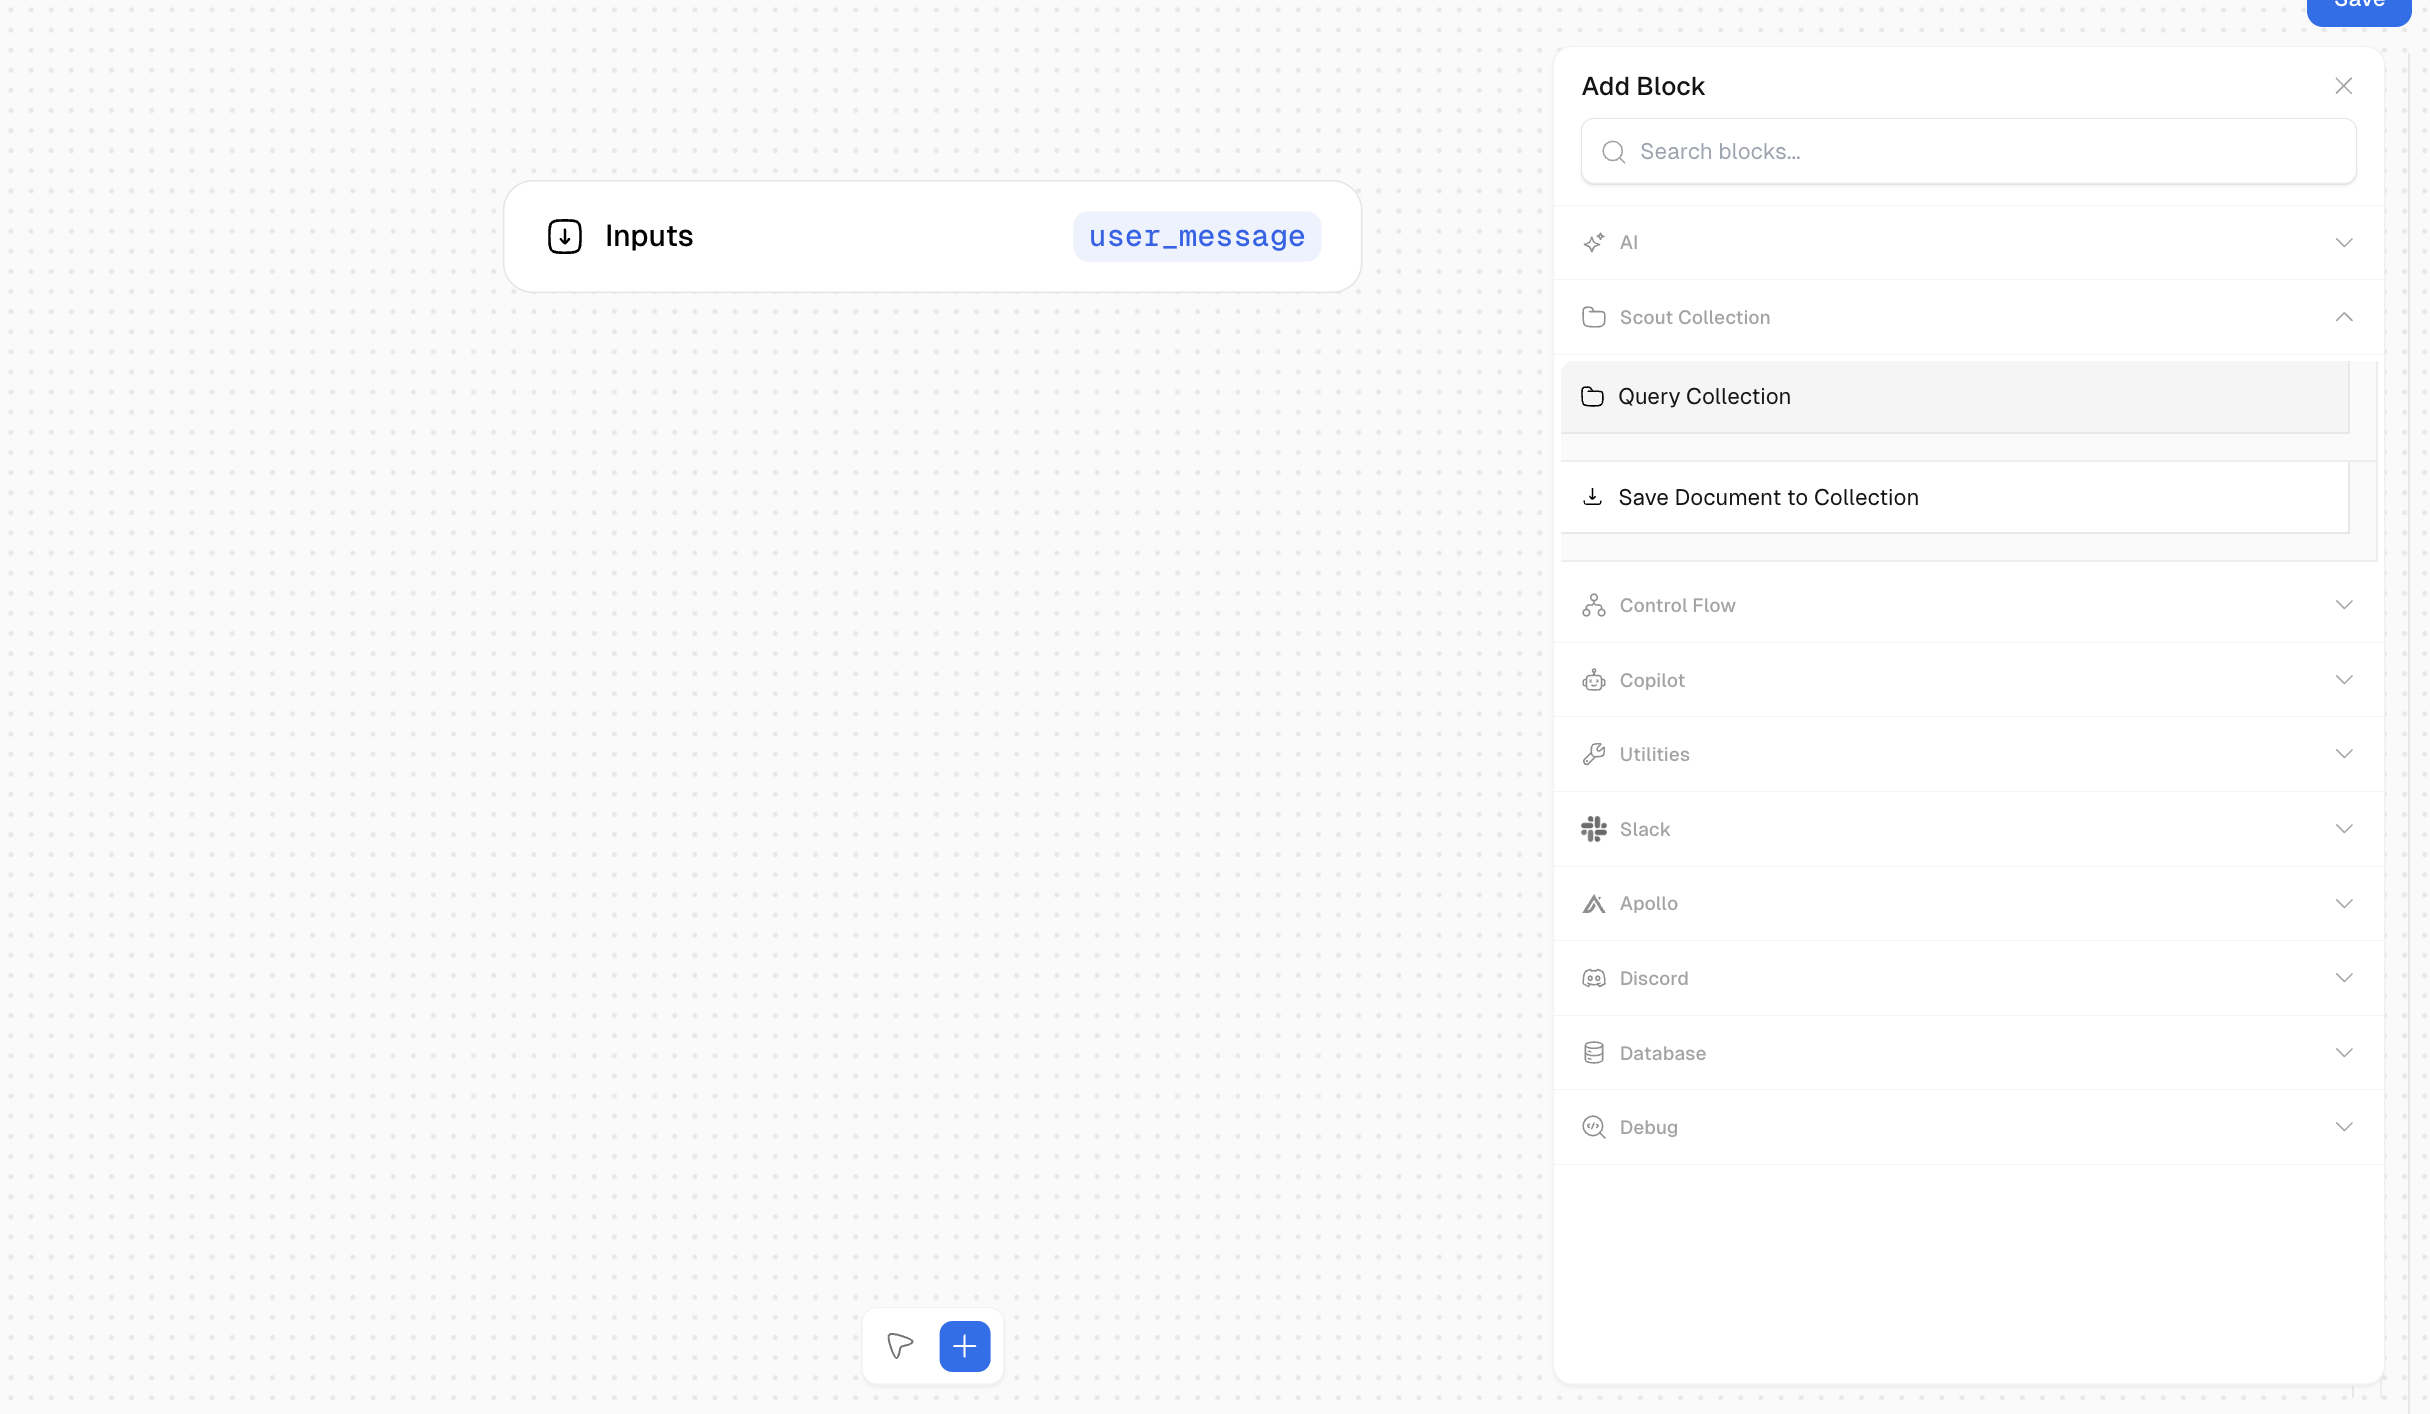
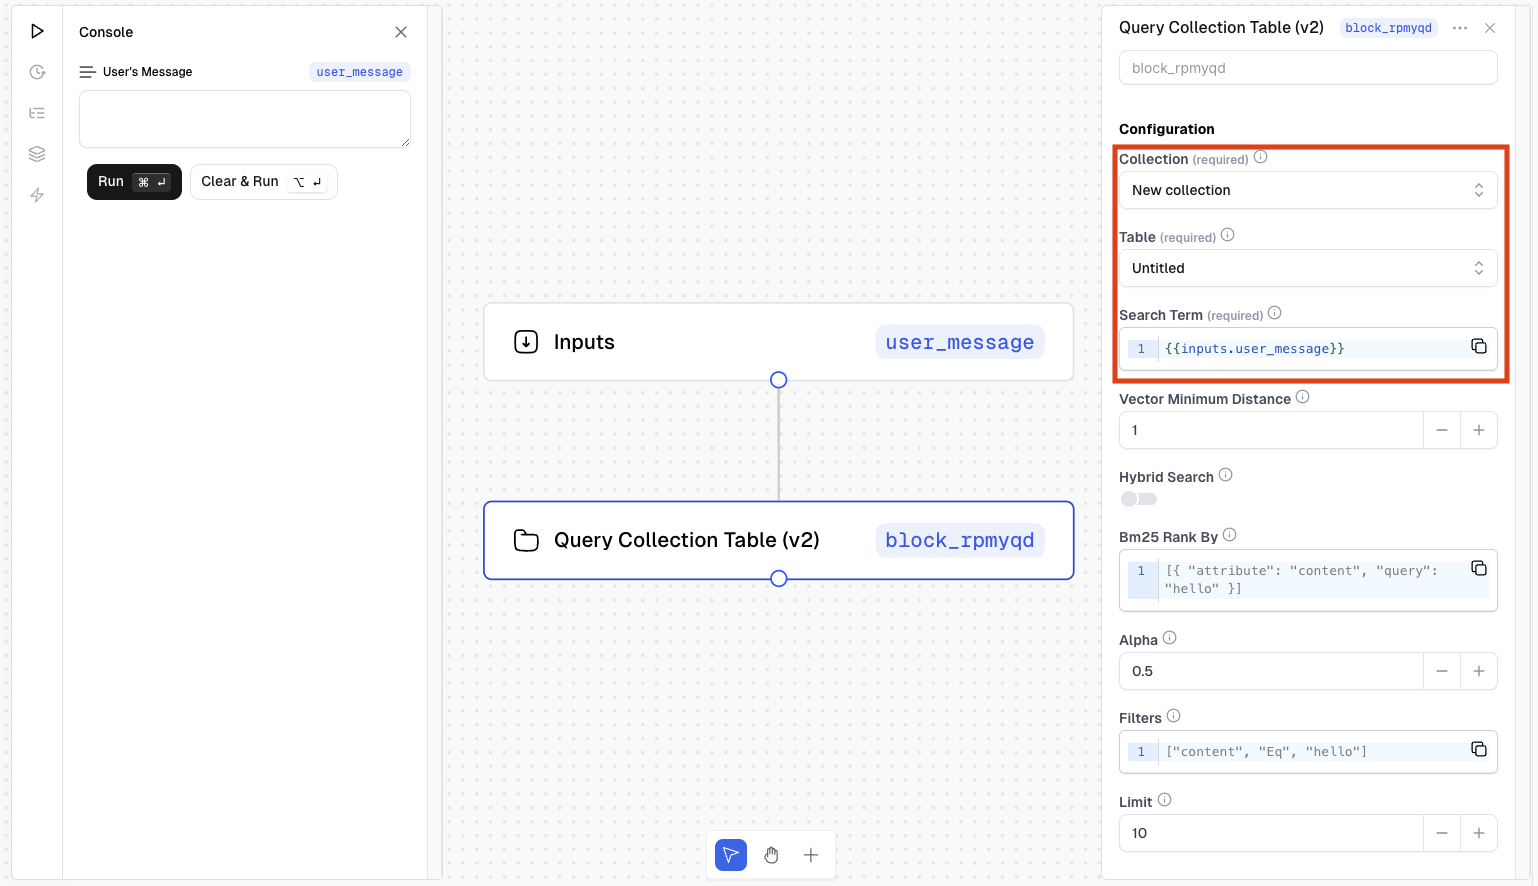
- Then, click the newly created query block, and modify its configurations as follows:
Database: Use the dropdown to select your databaseTable: Use the dropdown to select your tableQuery: This should be{{inputs.user_message}}in order to supply the RAG app’s input to the database query
- Everything else can be left as default. Click the “Save” button in the upper right-hand corner. Your settings should look as follows, except for the
Database IDshould be your unique value as mentioned above:
Add an LLM block
At the bottom of the workflow canvas click the ”+” button and drag a new AI > LLM block onto the workflow canvas
Then, click the newly created LLM block, and modify its configuration sections as follows:
- First is the Configuration section, where we’ll use the following settings:
Model: We’ll usegpt-4ofor thisTemperature: We’ll use0.7to keep it more factualMaximum Tokens: We’ll use2000as we’ll be supplying our queried documents in the requestResponse Type:text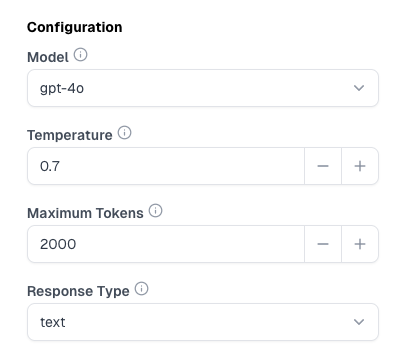
- Then we’ll configure the Chat Messages section as follows:
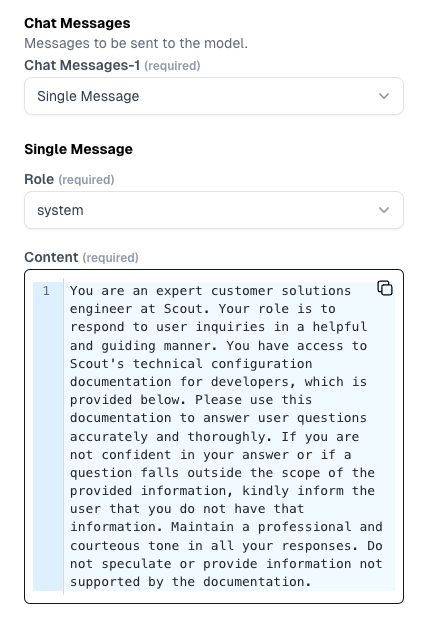
- First, we’ll add a System Message
- Click ”+ Add an item”

- Then change
Chat Messages-1:Single Message - Set
Role:system - And paste the following prompt into
Content - The final configuration for the System Message should look as follows:
- Click ”+ Add an item”
- Then, we’ll add the User Message
- Scroll to the bottom of the Chat Messages section and click ”+ Add an item” to add another Chat Message
- Then change the newly created
Chat Messages-2:Single Message - Set
Role:user - And paste the following prompt into
Content:Important: You will need to replace theYOUR_COLLECTION_BLOCK.outputvariable in the snippet above with your actual query block ID. You can easily copy your query block ID by hovering over it and clicking copy. For example, mine would becollection_rmdz0c.output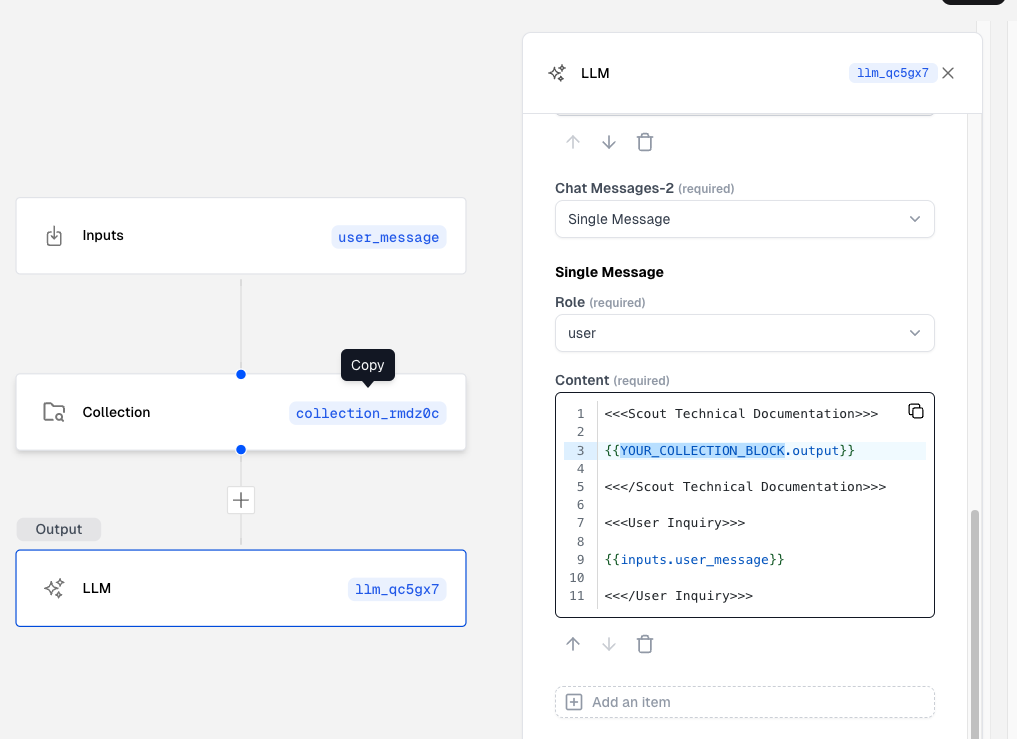 Lastly, click the “Save” button in the upper right-hand corner. Your RAG app (workflow) is ready!
- First, we’ll add a System Message
Run your workflow
There are a variety of ways to run workflows; Slackbots, Scout’s embeddable Copilot, SDKs, API, directly from the Console in the Scout workflow UI, and many more.
In this guide, we’ll keep it simple and test the output directly from the Console in the Scout workflow UI:
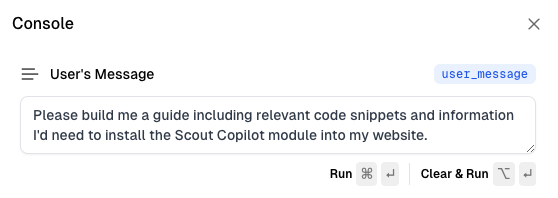
Run workflow from Scout Console
On the upper left-hand side of the workflow canvas, click the play icon to open the Console.
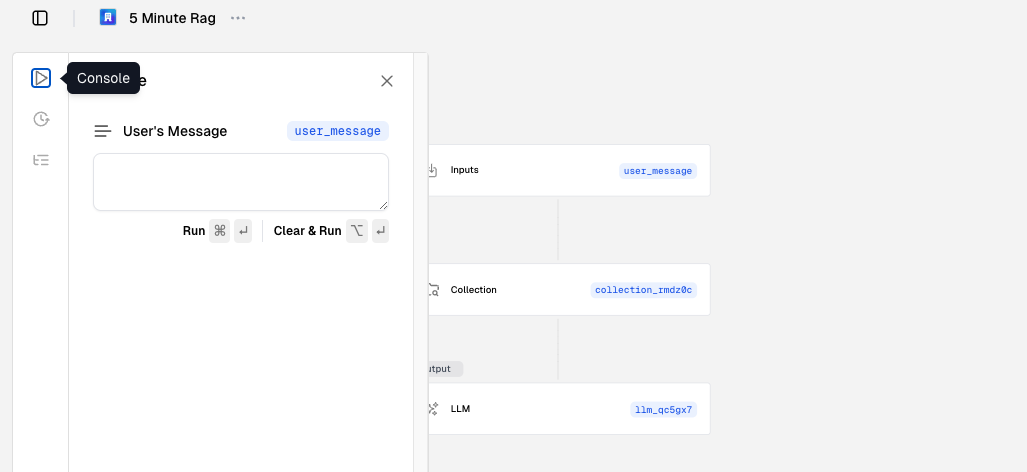
In the User’s Message text area, paste the following query then click “Run”:
The output will be automatically formatted and rendered below the input, and should look something like this:
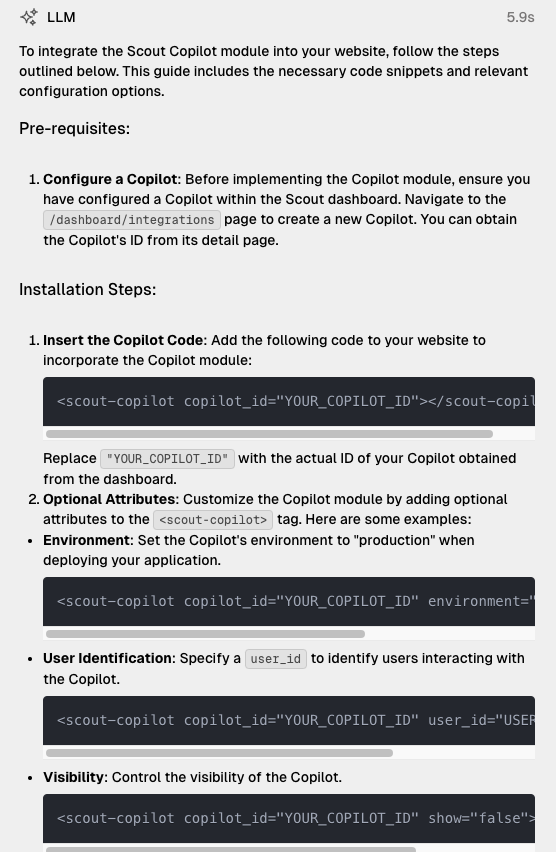
Voila! And there you have it; you built a RAG app that can answer questions using your own data!