Workflow Environments
Scout provides robust environment management capabilities, enabling you to deploy workflow revisions to specific environments and compare differences between versions. This feature ensures safe, controlled rollouts and makes it easy to track changes across your workflow development lifecycle.
Understanding environments
Scout organizes workflows into three primary environments:
- Production: The live environment where published workflows are actively running and accessible to end users
- Staging: A testing environment for validating newly published changes before promoting them to production
- Development: An experimental environment for testing changes while preserving both staging and production versions
Each environment can run a different revision of your workflow, allowing you to test changes in isolation before deploying them more broadly.
Accessing the environments panel
To manage environments and deploy workflow revisions:
- Navigate to your workflow canvas
- Look for the environments button in the workflow toolbar
- Click to open the environments panel
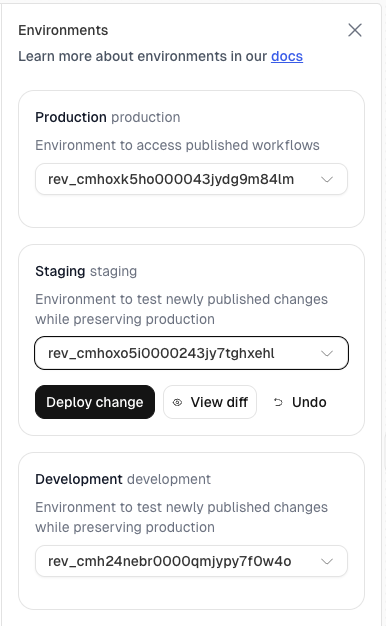
The environments panel displays:
- Environment name and description: Clear labels indicating each environment’s purpose
- Current revision: A dropdown showing which workflow revision is deployed to each environment
- Deployment actions: Options to deploy changes, view differences, or undo deployments
Deploying workflows to environments
To deploy a workflow revision to a specific environment:
- Open the environments panel
- Select the target environment (Production, Staging, or Development)
- Use the revision dropdown to select the version you want to deploy
- Click Deploy change to publish the selected revision to that environment
Each environment operates independently, so you can:
- Test experimental features in Development without affecting other environments
- Validate changes in Staging before promoting to Production
- Quickly rollback Production to a previous stable revision if issues arise
Comparing workflow revisions
Scout provides powerful diff viewing capabilities to help you understand exactly what changed between workflow revisions. This is especially useful before deploying to production or when investigating issues introduced by recent changes.
Accessing the diff view
To compare revisions:
- Open the environments panel
- Select a revision from the dropdown in any environment
- Click View diff to open the comparison view
The diff view shows a side-by-side comparison between two revisions, making it easy to spot changes at a glance.
Blocks mode (visual comparison)
Blocks mode provides a visual, workflow-level comparison that’s ideal for quickly understanding structural changes:
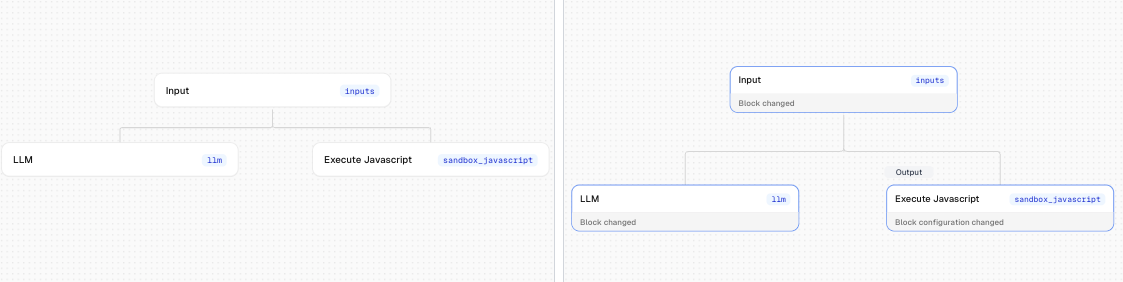
In blocks mode, you can see:
- Block changes: Blocks that were added, removed, or modified are clearly highlighted
- Configuration changes: Visual indicators show when block settings have been updated
- Connection changes: New or modified connections between blocks are visible
- Layout changes: Differences in block positioning and workflow structure
This view is particularly useful for:
- Understanding high-level workflow changes
- Identifying which parts of the workflow were affected
- Communicating changes to team members who may not be familiar with the underlying code
Code mode (JSON comparison)
Code mode displays a detailed, line-by-line comparison of the workflow’s JSON representation:
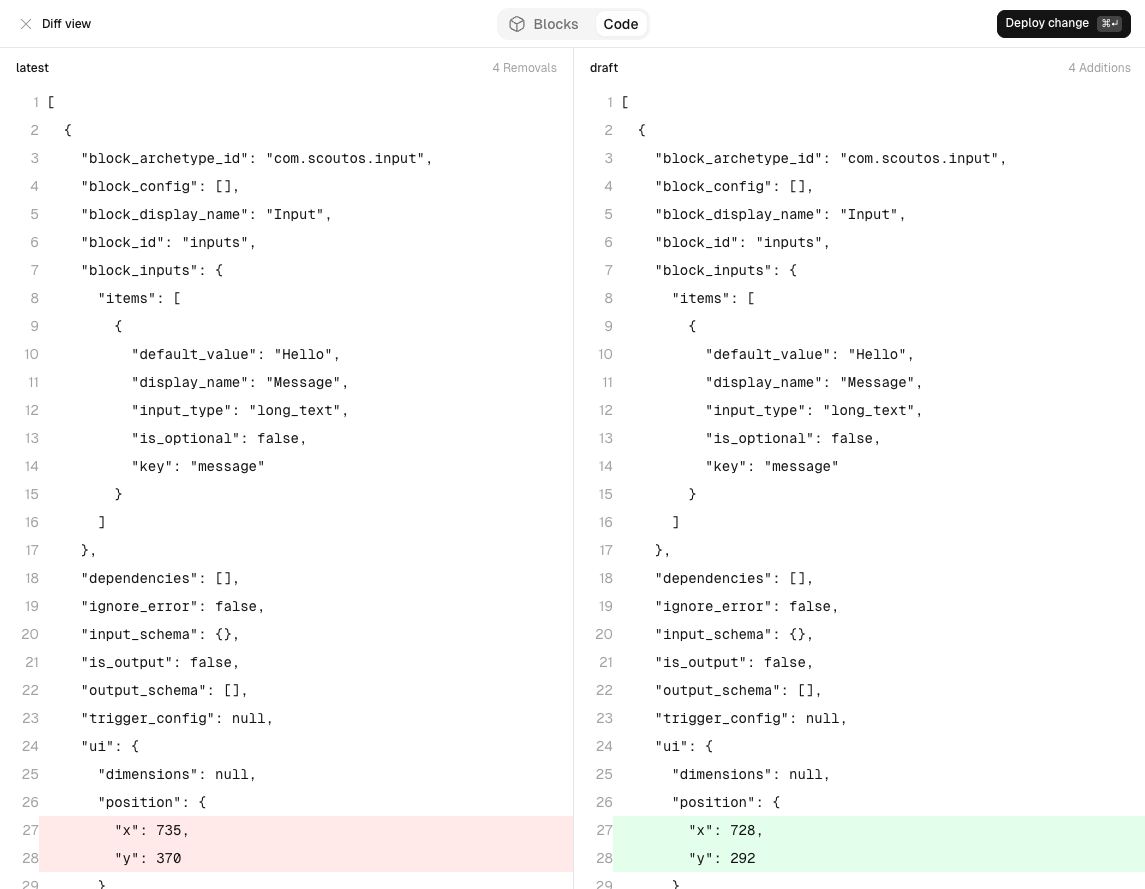
The code view features:
- Side-by-side comparison: Left side shows the original revision, right side shows the new revision
- Line-level highlighting: Removed lines are highlighted in red, added lines in green
- Line numbers: Easy reference for discussing specific changes
- Change summary: Headers show the total number of additions and removals
- Full workflow structure: Complete visibility into all configuration details, including block inputs, outputs, dependencies, and positioning
Use code mode when you need to:
- Review exact configuration changes in detail
- Verify specific parameter values
- Debug issues related to block configuration
- Document precise changes for compliance or audit purposes
Switching between views
Toggle between Blocks and Code modes using the tab selector at the top of the diff view. Both views display the same underlying changes, but offer different perspectives based on your needs:
- Use Blocks mode for quick visual reviews and high-level understanding
- Use Code mode for detailed technical reviews and precise configuration validation
Best practices
- Always review diffs before deploying to production: Use the diff view to understand exactly what’s changing
- Use descriptive revision names: Add meaningful names to revisions in the History panel to make them easier to identify when selecting deployment targets
- Test in Development first: Validate changes in the Development environment before promoting to Staging
- Promote progressively: Follow the Development → Staging → Production progression to catch issues early
- Keep Production stable: Only deploy well-tested revisions to Production
- Use Staging for final validation: Treat Staging as your pre-production environment with production-like conditions